Choosing the best Flux Core Welder starts with the work you actually plan to do. A compact machine may suit fence repairs, farm maintenance, or occasional projects in a home workshop. Heavier fabrication calls for more output, a suitable duty cycle, and enough adjustment to handle thicker steel. The biggest machine is not automatically the best choice.
Check the welder’s rated output, wire-feed range, and compatible wire sizes. These details affect how steadily you can lay a bead and which material thicknesses are realistic. Compare the duty cycle, too: it indicates how long the machine can weld within a ten-minute period at a stated output. A low duty cycle can mean frequent pauses during larger jobs. Small detail, big difference. Also consider weight, power requirements, drive-roll access, and whether replacement tips and rollers are easy to find.
Flux-cored welding is useful outdoors because it does not require a separate shielding-gas cylinder, but it still creates fumes, sparks, and slag. Work in a well-ventilated area, wear suitable protective gear, and follow the manufacturer’s instructions. Check the machine’s manual before relying on advertised material-thickness claims; joint design, preparation, and operator skill all matter. I would not choose by price alone. A low-cost model may be perfectly adequate for light repairs, yet frustrating if its feed system is inconsistent or its settings are limited. The right choice balances capability, ease of use, and the jobs you genuinely expect to tackle.
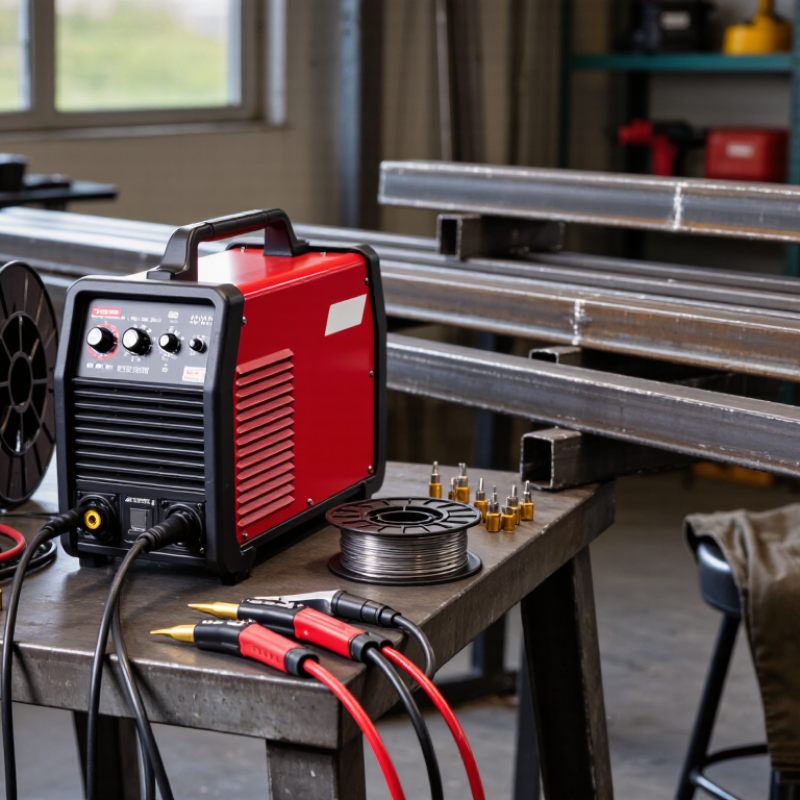
Flux-core welding, or FCAW, feeds a tubular wire that contains flux. The flux creates shielding and leaves a layer of slag over the weld. Some wires are self-shielded; others require shielding gas. That distinction matters when choosing a welder and planning a job. Self-shielded wire can suit outdoor work, where wind may disturb gas shielding, but it still produces fumes and slag.
FCAW is common in structural fabrication, construction, shipbuilding, and repair, especially where thicker steel and steady wire feeding are useful. The American Welding Society’s 2023 welding workforce data projected demand for 360,000 welding professionals in the United States by 2027. That figure describes workforce demand, not FCAW usage, but it shows why practical welding skills remain valuable. It is easy to overvalue maximum amperage; wire-feed control, duty cycle, and compatible wire sizes matter just as much. Small details matter.
Tips: Match the machine’s output range to the metal thickness you actually weld. Check its rated duty cycle, too. Clean mill scale and paint from the joint, then test settings on scrap. The first bead may look rough. Adjust slowly, and inspect the finished weld rather than trusting appearance alone.
Before comparing welders, define the jobs you expect to do. A small repair on a garden gate has different demands from joining thick steel brackets. Note the metal type, thickness, joint shape, and welding position. If you plan to work outdoors, self-shielded flux-core wire can avoid the need for a shielding-gas cylinder, though strong wind can still disturb the weld. Indoors, consider where fumes will go. Ventilation matters.
Be specific about your power and pace. Check the outlet available at your worksite, then compare it with the welder’s input requirements and usable output range. A machine’s duty cycle tells you how long it can weld before cooling; repeated long beads may need more capacity than occasional tack welds. Short jobs are different. Also check which wire diameters and spool sizes the machine accepts, and whether they suit your material. If you are new to welding, simple controls may help, but they will not replace practice. It is easy to focus on maximum amperage and overlook fit-up, access, or cleanup time. Make a short list of real projects, not ideal ones. That list may reveal a few inconvenient requirements.
| Project Requirement | What to Assess | Practical Guidance | Typical Fit |
|---|---|---|---|
| Material thickness | Thickness of the base metal you will weld most often, and whether occasional thicker work is expected. | Match the welder’s rated output and recommended material range to your common jobs. Thicker material may require multiple passes, joint preparation, or a higher-output machine. | Light repairs and thin sheet metal: lower-output equipment. Brackets, gates, and general fabrication: a broader output range. |
| Power supply | Available outlet voltage, circuit capacity, and whether you will work at home, in a shop, or on remote sites. | Check the machine’s input-voltage requirements and the circuit rating before buying. A welder cannot deliver its full rated output if the supply or extension cord is inadequate. | Home use: confirm compatibility with the available household circuit. Shop use: consider whether a suitable higher-voltage supply is available. |
| Self-shielded or gas-shielded wire | Whether you need outdoor wind tolerance, cleaner welds, or the ability to use shielding gas. | Self-shielded flux-cored wire uses no external shielding gas and is generally more practical outdoors. Gas-shielded flux-cored wire requires a gas supply and is more vulnerable to wind disrupting the shielding. | Outdoor repairs: self-shielded wire is often convenient. Controlled indoor work: gas-shielded wire may suit applications that call for it. |
| Wire diameter and feed system | Wire sizes supported, drive-roll setup, spool capacity, and how easily the feed speed can be adjusted. | Use wire that is compatible with both the machine and the chosen welding procedure. A smooth, consistent wire feed helps maintain a stable arc; check that drive rolls and contact tips are suitable for flux-cored wire. | Occasional repairs: a straightforward feed system may be enough. Frequent use: look for easy adjustments and readily available compatible consumables. |
| Duty cycle | The rated duty cycle at a stated amperage and the length of your typical welding runs. | Duty cycle is the percentage of a 10-minute period a machine can weld at its specified output before cooling is needed. Compare ratings at the output you expect to use, not just the maximum amperage. | Short repair welds: a modest duty cycle may be adequate. Longer fabrication sessions: prioritize a higher duty cycle at the required output. |
| Portability and work location | Machine weight, handle or wheels, cable reach, and access to a dependable power source. | For mobile work, consider the complete setup weight, including cables and wire. Keep cable length and power access practical without relying on undersized extension cords. | Garage or shop: a heavier machine may be acceptable. Field repairs: favor a manageable setup that fits the available power supply. |
| Weld position and joint access | Whether projects involve flat, horizontal, vertical, or overhead positions, and how accessible the joint is. | Wire type, machine settings, joint design, and operator technique all affect out-of-position welding. Consult the wire manufacturer’s procedure and practice in the positions required by your work. | Bench fabrication: mostly flat or horizontal welding. Repairs on installed structures: plan for less convenient positions and restricted access. |
| Material condition and preparation | Rust, paint, mill scale, dirt, and fit-up quality on the workpieces. | Flux-cored welding is not a substitute for proper preparation. Clean the weld area as required by the procedure, remove coatings that could create hazardous fumes, and secure a suitable ground connection. | Clean, prepared parts: more consistent results. Weathered or coated parts: allow time for safe cleaning and inspection. |
| Controls and usability | Whether the machine offers suitable voltage or power settings, wire-speed adjustment, and clear setup information. | Choose controls that let you set up the machine for the wire and material being used. Use the machine’s chart as a starting point, then verify settings with test welds on similar material. | New operators: clear setup guidance is useful. Experienced users: more adjustment options may help fine-tune the process. |
| Safety and accessories | Welding helmet, gloves, protective clothing, ventilation, fire safety, and consumable availability. | Budget for appropriate personal protective equipment and ventilation. Follow the welder and wire instructions, keep flammable materials away, and ensure compatible contact tips and nozzles are available. | Every project: provide eye, face, hand, and body protection, plus safe fume control and a clear fire-safe work area. |
Selection tip: Start with your most frequent projects, then confirm that the machine, wire, power supply, and rated duty cycle suit those jobs. Always follow the equipment and consumable manufacturers’ instructions and use a qualified welding procedure where required.
Flux-core welders differ mainly in shielding method, input power, and usable output range. The American Welding Society’s Welding Handbook describes self-shielded wire as suitable for work where shielding gas is impractical, while gas-shielded flux-core welding uses external gas. That distinction matters outdoors: wind can disturb gas coverage. Check the machine’s recommended wire diameters and setting chart against your steel thickness. A thin sheet can burn through quickly at excessive output. A test bead on scrap helps, though it cannot replace a sound joint inspection.
Input voltage limits where you can work and how much output is available. A 120-volt unit may suit lighter repairs; thicker material may call for a 240-volt supply and higher amperage. Compare rated output, not just the largest number on the front panel. NEMA EW 1 rates welding power sources by duty cycle over a ten-minute period: a 60% rating means six minutes of welding, followed by four minutes of cooling at the stated load. Ratings depend on output. I still find this easy to overlook. Also check thermal protection, wire-feed adjustment, and whether the machine supports the wire type you plan to use.
A flux-core welder is easier to learn when its controls are clear and its wire feed stays steady. Look for labeled voltage and wire-speed settings, a readable chart, and a torch that feels balanced in a gloved hand. Simple is useful. Before buying, check how quickly the spool loads and whether changing drive rollers requires tools. These details may seem minor in a store, then become irritating during a long repair. Practice on scrap steel close to the thickness you expect to weld. An uneven bead can point to technique, settings, dirty metal, or a wire mismatch.
Portability depends on more than weight. A sturdy handle, compact footprint, and space for a spare spool help when moving between a workbench and a driveway. Check the welder’s input-power requirements before using an extension cord; an unsuitable cord can cause voltage drop. Safety should shape the choice, not follow it. Look for thermal overload protection and sound cable connections, then verify specifications in the manual. Wear a welding helmet with the correct shade, gloves, and covered clothing, and provide good ventilation. Flux-core welding produces fumes and spatter. Clear combustibles from the work area and keep a suitable fire extinguisher nearby. I still underestimate setup time sometimes. A light machine can be awkward if it is difficult to position securely or use with proper ventilation.
Choose a flux core welder for the jobs you expect to do, not the thickest metal you might tackle someday. For small repairs on a fence or garden cart, a basic model with a stable low setting may be enough. If you plan to weld thicker steel, check the machine’s output range and recommended material thickness. A higher amperage rating alone does not guarantee clean, consistent welds.
The lowest-priced unit can cost more over time if wire, contact tips, or compatible parts are hard to find. Compare what is included, such as a gun, ground clamp, and spare tips. Check the input power and duty cycle, too; a short duty cycle may mean frequent cooling breaks during longer jobs. Keep some budget for protective gear and practice material. Small details matter.
Tips: Leave room in your budget for a properly rated welding helmet, gloves, and ventilation. Test the welder on scrap steel of similar thickness before starting a repair. Wire speed and voltage often need adjustment, and the first setting may not be right. That is part of the process.
Compare indicative purchase budgets with representative maximum output. Higher amperage does not guarantee better results; check duty cycle, input voltage, and the material thickness you plan to weld.
Figures are general planning estimates, not fixed market averages or product specifications. Prices and capabilities vary by model, region, and included accessories.
Flux-core welding feeds tubular wire containing flux. The flux creates shielding and leaves slag over the weld.
It can suit outdoor work because wind may disturb shielding gas. It still creates fumes and spatter.
Match the output range to your steel thickness. Check duty cycle, wire sizes, and input power. Maximum amperage is not everything.
At the stated load, it allows six minutes of welding in a ten-minute period, followed by four minutes of cooling.
It may suit lighter repairs. Thicker steel may need a 240-volt supply and higher output.
Clean paint and mill scale from the joint. Test settings on similar scrap, then adjust slowly. The first bead may look rough.
Clear settings, steady wire feed, and a readable chart help. Check spool access and drive-roller changes, too.
Wear a correctly shaded helmet, gloves, and covered clothing. Ventilate the area, clear combustibles, and keep a suitable fire extinguisher nearby.
Check its handle, footprint, and input requirements. An unsuitable extension cord can cause voltage drop. I still underestimate setup time.
Choosing the best Flux Core Welder starts with understanding how flux-core welding works and where it is useful, such as repairs, home projects, or outdoor fabrication. Consider the materials, thicknesses, and frequency of your planned work, since these needs will guide the machine’s power, duty cycle, and wire-feed capabilities. Comparing welder types and key specifications helps you find a model suited to your tasks without paying for features you may not use.
Ease of operation, portability, and safety are also important. Look for controls that feel manageable, a setup that fits your workspace, and practical safety features, while using appropriate protective equipment. Finally, set a realistic budget and compare the overall value of each option, including essential accessories and ongoing supplies. Matching your project requirements with suitable performance and usability will help you choose a welder that serves you reliably.

Orient PengSheng